
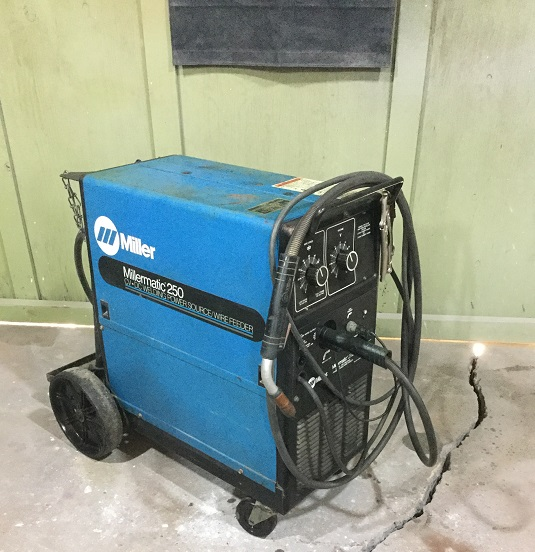
It can be quite disappointing when your purchased Miller 250x doesn’t meet up your expectations. Figuring out what’s wrong with the machine and troubleshooting can get pretty much frustrating at some point.
So, what are the common Miller 250X problems that you can face while welding?
One of the most common problems you can encounter is the wire burning back. Besides, you can also get no output while welding even if the wire is feeding or not. Improper wire speed really disturbs the functionality of your machine resulting in you struggling.
However, hold your horses because you are going to say goodbye to all these troubles. But before that, you need to check out our article. It has an in-depth overview of these problems and solutions.
Then what are you waiting for? Scroll down!
Miller 250X Problems And Troubleshooting
Miller 250x users can face multiple problems. But before we provide you with solutions, let’s take a glance at what the problems are. These problems are similar to the problems with dewalt string trimmer.
| Problem | Solution |
| Wire Burning Back | Adjust the arc starting voltage |
| No Wire Feeding | Check if the drive motor leads receive 24V, and the continuity of circuit breaker CB1. |
| Improper Wire Speed | Adjust the front panel setting |
| No Weld Output | Turn on the line disconnect switch |
| Pc Board Problem | Reset the circuit board |
Problem 1: Wire Burning Back
Burn back can indeed be a very frustrating experience. The reason behind this can be too little tension on the drive rolls. On the other hand, a lot of tension can also lead to the same situation.
Besides that, a bad liner can also have effects on the wire causing it to burn back
You have to notice if the wire has a lot of marks on it as it passes through the contact tip. It means a lot of tension has been put on the drive rolls. It pushes a lot of shavings into the liner and causes friction.
Wire feed problems are one of the major reasons for wire burn backs on the arc start. A bad mig gun or loose work can also result in vital issues in the beginning.
To an extent, it can also create a flat spot in the wire during advancing.
Solution:
250X is manually prepared to start the arc at 24 volts. Having set the arc, the voltage would then go to whatever level you had chosen. .023 wire sometimes experiences burn backs as a result.
An arc can be created by clipping one of the leads of Diode D1. The required voltage set on the Digital VoltMeter should be reached. The choice is yours to make. For the Miller 250X hot start, you can connect the switch to the clipped end of the diode and the pad on the board.
The front panel can be modified to add a switch. Diode D1 is marked D1 on the miller 250X circuit board. The diode lies in the right-hand upper corner of the board.
Also, make sure the Feed Motor Torque control is set correctly. This is the Blue Pot R8. Once you feel the ratcheting, keep turning the screw adjustment control on Pot R8 counterclockwise. After two turns, turn it clockwise again.
Following all the procedures mentioned above can help fix your wire burning back.
Problem 2: No Wire Feeding
Often you can face problems when the wire stops feeding. When the trigger is depressed you will hear the welder voltage is engaged. You will also find out that the gas is activated. Despite this, the wire refuses to feed and the drive wheel won’t turn.
For more insights on this, you can check out wire feeding system issue.
Solution:
First, you need to check if by pulling the trigger you receive ~24V to the drive motor leads. If that’s not the case, to ensure the continuity check the circuit breaker CB1. When both of them are functioning properly then it’s an issue related to the control board.
The wire speed control should be increased to a higher setting. Check to see if there is any obstruction in the gun contact tip or liner. Reset the drive roll pressure as needed. Set the drive rolls to the correct dimensions. The welding wire should be rethreaded.
Check your gun trigger and leads. Following these instructions will be easier: store Milwaukee batteries.
Problem 3: Improper Wire Speed
Sometimes you can see that the speed with the wire is not running properly. It is either too high or too low. Or the speed is very erratic resulting in the machine being dysfunctional.
Solution:
Firstly, The front panel settings need readjustment. The Low Range/Full Range switch should be placed in the correct position.
Check to see if the drive rolls are of the correct size or not. Then, adjust the drive roll pressure accordingly. Replace the inlet guide, and contact tip to make sure everything is working perfectly. You may also need to replace the miller 250X liner. Lastly, the position of the input jumper link should be checked for a final conclusion.
Problem 4: No Weld Output
This is one of the most common problems that customers face while welding with 250x. And it actually consists of two results along with it. One of them is when the wire feeds and the other one is when the wire does not feed.
But don’t you worry because we got solutions for both of the scenarios.
Solution:
Make sure the line disconnect switch is on if the wire does not feed. Reset the circuit breaker if it is open. Or you can try replacing the build-inline fuse. The circuit breaker CB1 needs a reset. Check to see if the gun trigger connections are secured. If essential, check and replace the power switch.
And in case when the wire feeds, open the Thermostat TP1 because it has occurred due to overheating. Start the fan; after the unit has cooled the thermostat will close on its own.
To get good metal in touch with metal contact, connect the work clamps. If needed replace the contact tip. Now if an overload condition has occurred, release the gun trigger. Get the main control board and the main rectifier checked by the Factory Authorized Service Agent.
That was all about the Miller 250X problems. We hope we have been able to satisfy your inquiries. For any additional information, go through the millermatic 250x manual.
Problem 5: Millermatic 250x Pc Board Problem
Any issue relating to the main control board of the Millermatic 250X welding machine is considered a Millermatic 250X PC board problem. Millermatic 250X’s main control board regulates and controls its various functions and settings. An issue with the PC board may result in operational issues that require a professional inspection and repair to ensure that the welding machine is functioning properly.
Solution:
If you encounter this problem, here are some troubleshooting steps you can take:
- Check the main control board: Consult the owner’s manual and have a Factory Authorized Service Agent inspect the main control board. They have the expertise to identify and address PC board problems effectively.
- Reset the circuit breaker: Try resetting circuit breaker CB1 as specified in Section 4-2 of the owner’s manual. This simple step may resolve minor issues related to the PC board.
- Check wire speed control: Adjust the wire speed control to a higher setting and observe if it resolves the problem. Sometimes, issues with the PC board can affect the wire speed control functionality.
- Check for burned out components: If you have recently replaced a burned out component and it fails again, there may be an underlying issue such as a short circuit or damaged wiring. Inspect the board for any burned out components or damaged wiring and address them accordingly.
- Consider replacing the circuit board: If you are unable to identify and fix the PC board problem, you may need to consider replacing the circuit board. However, this can be an expensive repair, so carefully evaluate whether it is worth the cost in comparison to the age and overall condition of the welding machine.
Still Facing Issues?
It’s not the end of the world if you still haven’t been able to fix your Miller 250X. A lot of the time this troubleshooting can’t fix your specific concerns. In that case,
- Check that your machine is functioning properly.
- VOM should be used to keep a check on the voltage of the line
- Check that your input voltage jumpers are configured correctly for your line voltage. The output voltage of the welder should be checked with a VOM at the cable lugs.
Frequently Asked Questions (FAQs):
Is Miller 251 an updated version of Miller 250x?
Yes, Miller 251 is an updated version of Miller 250X. Materials with a thickness of 22 gauge to 1/2 can be welded in one chance.
Does Miller make good welders?
True, Miller manufactures the best welders at the best prices. Their market demand is very high among the customers. Because of their availability and a wide horizon of options they are everyone’s favorite in the market.
Can a millermatic 250X be welded with aluminium?
Yes, you can weld aluminum using a millermatic 250x. For a spool gun, 30A should be appropriate. For aluminum, you’ll need straight Argon. The 14 pin connector is also an additional requirement.
Conclusion
So, that concludes our guide. We are confident that you won’t be facing Miller 250X problems anymore.
If you’re still facing problems with your Miller 250X, then check all of its parts once again. Try to pay attention to the smallest details while troubleshooting.
Until next time. Good luck!

Robert S. Dehner is an experienced content writer at Power Tool Institute. He has a wealth of experience in the field and is committed to providing you with up-to-date information and advice on the effective and safe use of power tools.
I have a Miller Matic 250 wire welder will not quit feeding the wire. What is my problem?